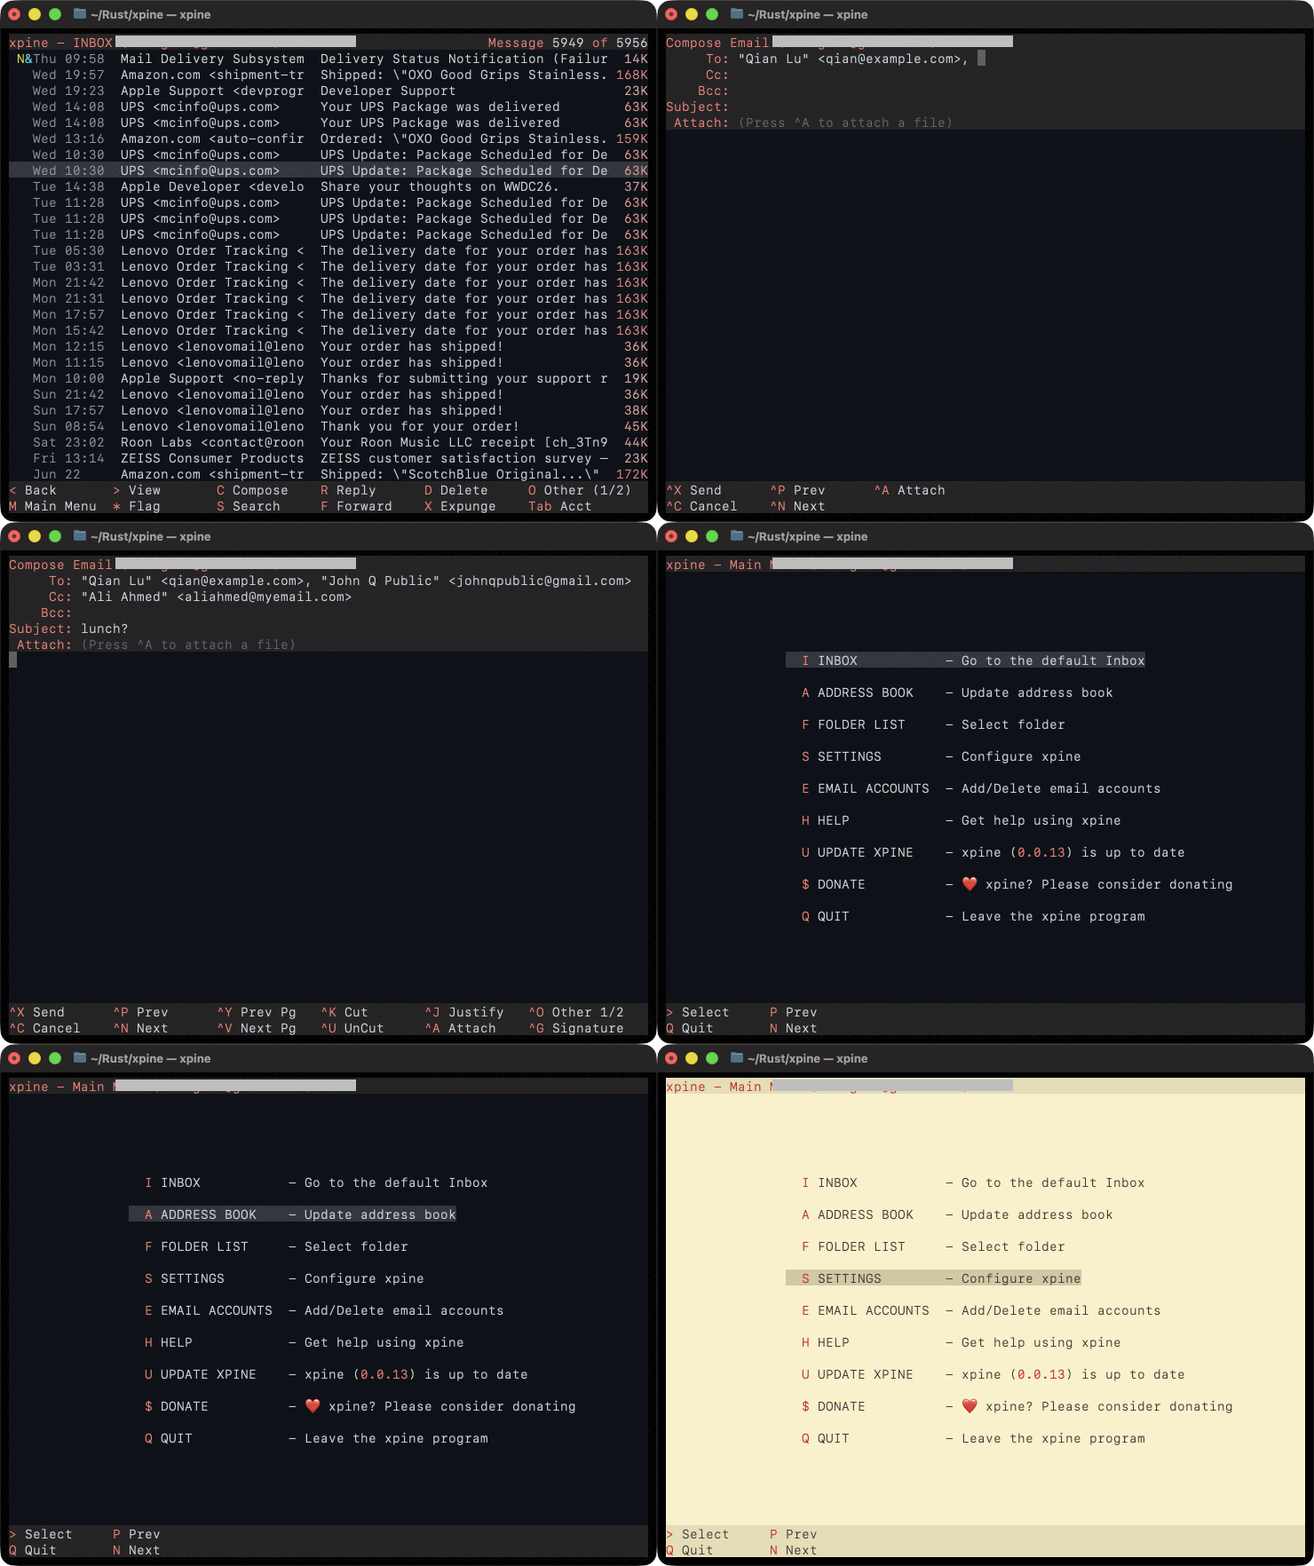
Features
- Authentication: Full support for standard IMAP/SMTP accounts
- Google Accounts: OAuth 2.0 authentication or Application Specific Passwords
- Microsoft Accounts: Graph API with OAuth 2.0 authentication for Outlook, Hotmail, and Exchange accounts
- Yahoo, Apple: Application Specific Passwords
- Multiple Accounts: Multiple accounts are supported -- switch between accounts with a single keystroke
- Help: Built-in help describing the hot-keys and functionality
- Editor: Compose emails with a built-in text editor that includes soft-wrapping and paragraph justification
- Address Book & Teams: Manage individual contacts, import lists, and create distribution groups ("Teams")
- Address Completion:
xpineprovides for autocompletion of email addresses (just hittab) - Spell Checking: With the option to automatically spellcheck before sending an email
- Flexible Signature: Insert your signature where/if you want with a single keystroke
- Auto Prettify:
xpineautomatically justifies your email upon sending --- ragged emails will look nice - Folders: Move emails from folder-to-folder
- Theming: Multiple built-in color themes
- Updates: Built-in update checker
- Platforms: Runs on macOS and Linux
Initial Setup
macOS
In your Terminal settings, go to Profiles > select your profile > Keyboard and make sure Use Option as Meta key is checked.
Gmail Users
In Gmail (on the web), go to Settings > See all settings > Forwarding and POP/IMAP and make sure Auto-Expunge off - Wait for the client to update the server is checked.
Determine Authentication Method
Before running xpine, determine your authentication method and get the necessary information.
- Google Gmail App Specific Password (less secure, easier to set up) instructions
- Google Gmail OAuth 2.0 (more secure, harder to set up, need to generate Google
client_idandclient_secret) instructions - Microsoft Outlook, Hotmail, Exchange (Graph API OAuth 2.0, can be easily setup directly in
xpine) - Yahoo App Specific Password instructions
- Apple/iCloud App Specific Password instructions
Installation
macOS
The easiest way to install xpine on macOS is using the pre-compiled installer package. The application is fully signed and notarized by Apple.
- Go to the Releases page.
- Download the latest
xpine-xxxxx-macos.arm64.pkgfile. - Double-click the downloaded
.pkgfile and follow the standard installation prompts. - Open your terminal and type
xpineto launch the application.
Linux
Option 1: Debian/Ubuntu (.deb package)
If you are using Debian, Ubuntu, Linux Mint, Pop!_OS, or any other Debian derivative:
- Download the latest
xpine-xxxxx-linux.amd64.debfile from the Releases page. - Open your terminal and navigate to your downloads folder.
- Install the package using apt:
sudo apt install ./xpine-xxxxx-linux.amd64.deb - Run
xpinefrom your terminal.
Using the .deb package will allow for Google Gmail OAuth 2.0 authentication.
Option 2: Compile from Source
For other Linux distributions (Fedora, Arch, etc.), or if you prefer to build from source, you can easily compile xpine using cargo.
1. Install System Dependencies
You will need the standard C compiler tools and OpenSSL headers to handle secure IMAP and HTTP connections.
- Debian / Ubuntu / Pop!_OS:
sudo apt update sudo apt install build-essential pkg-config libssl-dev - Fedora / RHEL / CentOS:
sudo dnf groupinstall "Development Tools" sudo dnf install pkgconf-pkg-config openssl-devel - Arch Linux / Manjaro:
sudo pacman -S base-devel pkgconf openssl
2. Install Rust
If you do not have Rust installed on your system, install it via rustup:
curl --proto '=https' --tlsv1.2 -sSf https://sh.rustup.rs | sh3. Build xpine
Clone the repository and build the release binary:
git clone https://github.com/mabognar/xpine.git
cd xpine
cargo build --release
Once compiled, the executable will be located at target/release/xpine. You can safely move this binary to /usr/local/bin/ or any other directory in your $PATH to run it globally.
Getting Started
To launch the client, simply open your terminal and type:
xpineOn your first launch, you will be greeted by the Main Menu. Press E to navigate to Email Accounts and add your first account. xpine will safely and locally store your configurations in ~/.xpine/xpinerc.
Connecting via IMAP/SMTP (App Passwords)
If you are using Yahoo, Apple iCloud, or prefer to connect to Gmail via standard IMAP instead of OAuth, you cannot use your regular email account password to log into xpine.
Modern email providers require you to generate a unique Application-Specific Password. This is a special 16-character password created just for xpine that allows it to securely sync your mail.
Note: For almost all providers, you must have Two-Factor Authentication (2FA) enabled on your account before the option to create an App Password will appear.
Google Gmail
(Note: If you use the Gmail OAuth option in the xpine menu, you do not need to do this. This is only for the "Basic IMAP" menu option).
- Go to your Google Account management page.
- On the left navigation panel, click Security.
- Under the "How you sign in to Google" section, ensure 2-Step Verification is turned ON.
- Click on 2-Step Verification and scroll all the way to the bottom of the page.
- Click on App passwords.
- In the "App name" field, type
xpineand click Create. - Google will generate a 16-character password in a yellow box. Copy this exact password (without spaces) and paste it into the
xpinepassword prompt.
Yahoo Mail
- Log into your Yahoo account and go to your Account Security page.
- Scroll down to the "Other ways to sign in" section.
- Click on Generate and manage app passwords.
- Type
xpineinto the "App name" field and click Generate password. - Yahoo will display a one-time, 16-character password. Copy this (without spaces) and use it to log into
xpine.
Apple iCloud Mail
- Go to appleid.apple.com and sign in with your Apple ID.
- In the left navigation panel, click App-Specific Passwords.
- Click the Generate an app-specific password button (or the "+" icon).
- Enter
xpineas the name and click Create. - Enter your standard Apple ID password to confirm.
- Apple will reveal a 16-character password (formatted like
xxxx-xxxx-xxxx-xxxx). - Copy this password and use it as your
xpinepassword.
Troubleshooting:
- Never type the spaces. Even if the provider displays the password with spaces (e.g.,
abcd efgh ijkl mnop), always enter it intoxpineas a single continuous string (abcdefghijklmnop). - App Passwords are shown exactly once. If you lose it or need to reinstall
xpineon a new machine without copying your securesecrets.encvault, simply delete the old password from your provider's website and generate a new one.
Setting Up Google Gmail OAuth 2.0
Because xpine is a fully local, open-source terminal application that requires full read/write access to your inbox, Google classifies it as requesting a "Restricted Scope." For a centralized application to offer this automatically, Google requires a costly third-party security audit.
To keep xpine free, open-source, and secure, it utilizes a "Bring Your Own Credentials" (BYOC) model. You will act as your own developer by generating a personal, free Google Cloud credential. This takes about 3 minutes and ensures your OAuth tokens are tied exclusively to your personal project.
Step 1: Create a Google Cloud Project
- Navigate to the Google Cloud Console (https://console.cloud.google.com/) and log in with your Google account.
- Click the project dropdown menu in the top-left navigation bar and select New Project.
- Name your project (e.g., xpine-local-client) and click Create.
Step 2: Enable the Gmail API
- Make sure your newly created project is selected in the top-left dropdown.
- In the left sidebar, click APIs & Services, then click Library.
- Search for Gmail API, click on it, and click Enable.
Step 3: Configure the OAuth Consent Screen
- In the left sidebar under APIs & Services, click OAuth consent screen.
- Select External as the User Type and click Create.
- Fill in the required fields: App Name (e.g., xpine-client), User Support Email (your email), and Developer Contact Information (your email). Ignore all other optional fields and click Save and Continue.
- On the Scopes screen, click Add or Remove Scopes.
- Manually paste https://mail.google.com/ into the search/filter box, check the box to add it, click Update, and then Save and Continue.
- On the Test Users screen, click Add Users. Type your exact Gmail address, click Add, and then Save and Continue.
Step 4: Generate Your Credentials
- In the left sidebar, click Credentials.
- Click + Create Credentials at the top of the screen and select OAuth client ID.
- Select Desktop app from the Application type dropdown.
- Name it (e.g., xpine-desktop) and click Create.
- A popup will appear containing your Client ID and Client Secret. Keep this window open.
Step 5: Connect xpine
- Launch xpine in your terminal.
- Navigate to the Accounts menu and select the option to add a new Gmail OAuth account.
- When prompted, carefully paste your Client ID and Client Secret.
- Your browser will open. You will see a warning stating "Google hasn’t verified this app." Because you just created this app in Testing mode for yourself, this is expected. Click Advanced, then Go to xpine-client (unsafe), and click Continue.
Security Note: xpine uses AES-256-GCM encryption to automatically secure your Client Secret and refresh tokens locally on your machine. They are never stored in plain text.
Security & Credential Management
xpine ensures sensitive information (such as IMAP passwords, OAuth 2.0 refresh tokens, and client secrets) is never stored in plain text on your drive.
Here is how xpine manages your credentials securely:
- Separation of Data: Non-sensitive settings (like your email address and IMAP server ports) are stored in a standard plain text TOML file (
~/.xpine/xpinerc). However, all sensitive credentials bypass this file entirely. - AES-256-GCM Encryption: Passwords and OAuth tokens are stored in a separate, fully encrypted binary vault (
~/.xpine/secrets.enc).xpineuses AES-256-GCM, an industry-standard authenticated encryption algorithm, to secure this data. - Auto-Generated Master Key: On first launch,
xpinegenerates a cryptographically secure 256-bit master key (~/.xpine/.master.key) used to encrypt and decrypt your vault. - Strict File Permissions: On macOS and Linux systems,
xpineautomatically enforces strict0600(read/write by owner only) file permissions on the master key. This ensures that other users on the same machine or unauthorized applications cannot read your encryption key.
Note: If you migrate your xpine configuration to a new computer, you must copy both the secrets.enc vault and the hidden .master.key file for your encrypted credentials to carry over successfully.
License
This project is licensed under the LICENSE file included in the repository.